

When Do You Need To Disconnect A Car Battery?
There are several situations where you may need to disconnect your car’s battery:
Replacing the battery:
If your current battery is old, defective, or no longer holding a charge, disconnect it and install a new one. Batteries typically have a lifespan of 3-5 years, and signs like slow engine cranking, dimming headlights, or a swollen battery case indicate it’s time for a replacement.
Electrical repairs or maintenance:
When working on your vehicle’s electrical system, disconnecting the battery can prevent short circuits or power surges that could damage sensitive components. This includes tasks like replacing alternators and starters or performing any wiring repairs.
Long-term storage:
If you plan to store your car for an extended period, such as over the winter months or during an extended vacation, disconnecting the battery can prevent it from draining and potentially damaging other electrical parts due to parasitic draw.
Jump-starting assistance:
Sometimes, you may need to disconnect a dead battery before attempting to jump-start your car, especially if the battery is severely discharged or damaged.
Preventing electrical system issues:
In some cases, disconnecting the battery can help reset the vehicle’s electrical system, which may resolve issues like warning lights, faulty sensors, or other electrical gremlins.
No matter the reason, it’s crucial to follow the proper steps to ensure your safety and to avoid damaging your vehicle’s electrical system or the battery itself.
How To Disconnect A Car Battery, Step by Step
Disconnecting a car battery is a relatively simple process, but taking the necessary precautions and following the correct procedure is essential. Here’s a step-by-step guide:
Step 1: Start By Turning The Ignition Off
Before you begin, ensure that your car is turned off and the ignition is in the “off” position. This prevents any electrical current from flowing through the system while you work on the battery, reducing the risk of short circuits or electrical shocks.
It’s also a good idea to remove any jewelry or metallic objects that could come into contact with the battery terminals and cause a short circuit.
Step 2: Find the battery
Locate your car’s battery. In most modern vehicles, the battery is situated in the engine bay, typically on one side or the other. However, some manufacturers may place the battery in the trunk or under the rear seat, especially in some European models.
Consult your owner’s manual if you need help finding the battery’s location. The manual will provide specific instructions and diagrams for your vehicle.
If the battery is located in a hard-to-reach area or under a cover, you may need to remove any obstructions or panels to access it properly.
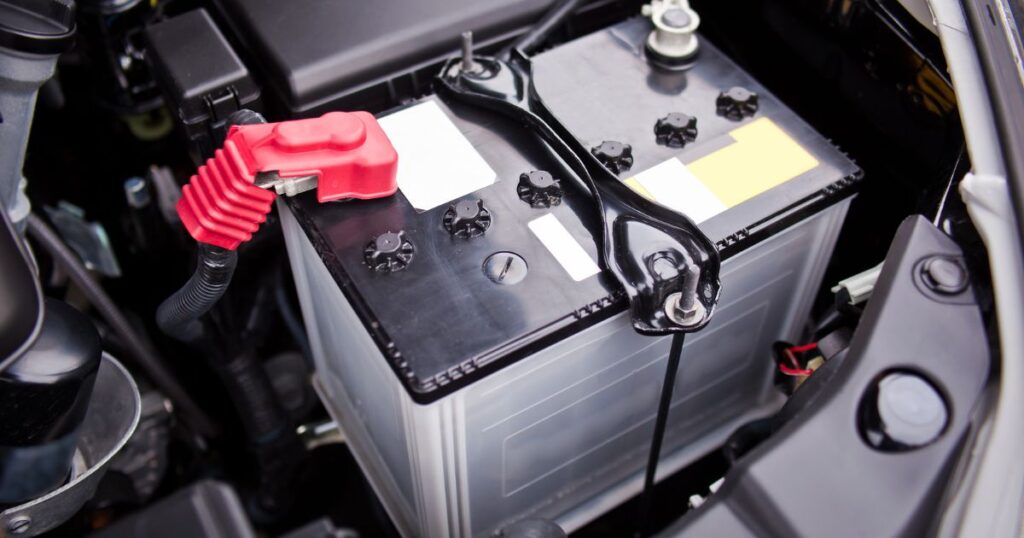
Step 3: Remove the terminals
Once you’ve located the battery, you must remove the terminal connections. Here’s how:
- Identify the positive and negative terminals: The positive terminal is usually marked with a “+” sign, a “POS” abbreviation, or red, while the negative terminal is marked with a “-” sign, a “NEG” abbreviation, or black.
- Loosen the negative terminal first: Loosen the nut or bolt securing the negative terminal cable using an appropriately sized wrench or pliers. Disconnect the cable from the negative terminal by gently twisting and pulling it off. Ensure that the cable doesn’t touch any metal parts of the vehicle, as this could create a short circuit.
- Remove the positive terminal: Next, disconnect the positive terminal cable in the same manner, loosening the nut or bolt and carefully removing the cable.
Necessary: Always remove the negative terminal first and reconnect it last. This helps prevent accidental short circuits or sparks, which could be dangerous and cause damage or injury.
If your battery has additional cables or vents connected, disconnect or remove them, following the manufacturer’s instructions.
Step 4: Remove the restraints
Most car batteries are held in place by a restraint system, such as a bracket, clamp, or tie-down strap. Locate and remove this restraint, being careful not to touch the terminals with any metal tools, as this could cause a short circuit.
Sometimes, you may need a socket wrench or screwdriver to loosen bolts or fasteners securing the restraint system.
Step 5: Remove the battery
With the terminals and restraints removed, you should now be able to lift the battery out of its compartment. Depending on the size and weight of the battery, you may need assistance or use proper lifting techniques to avoid injury.
Note: Batteries contain corrosive acid, so handle them carefully and wear protective gear like gloves and safety glasses. Avoid tilting or jarring the battery, as this could cause acid spillage.
If the battery is particularly heavy or awkwardly positioned, consider using a battery carrier or strap to transport it safely.
Step 6: (Optional) Clean the terminals
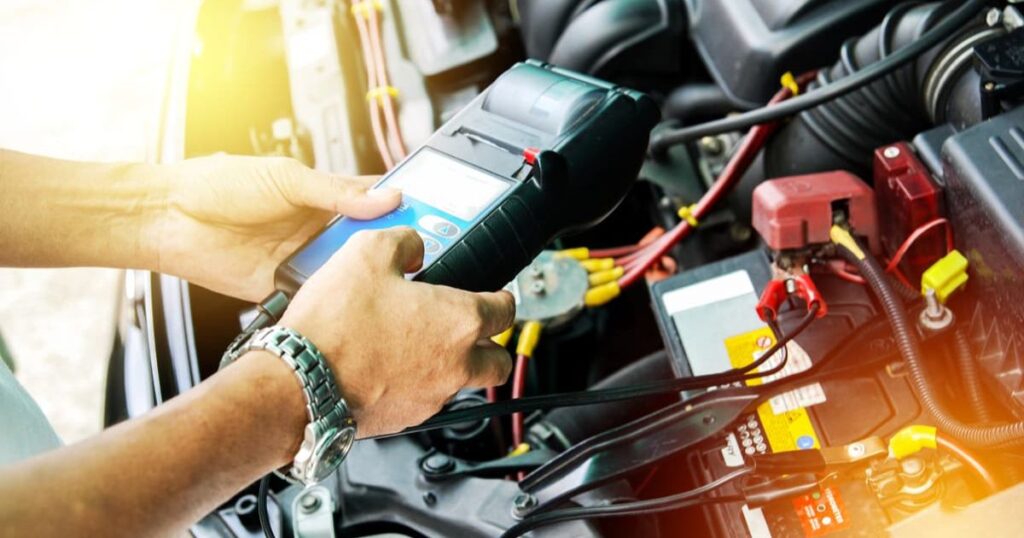
If you notice any corrosion, buildup, or discoloration on the battery terminals or cable connectors, cleaning them before reinstalling the new battery is a good idea. This will ensure a proper electrical connection and prevent any issues caused by corrosion.
You can use a wire brush, baking soda, and water solution to remove debris or corrosion. Alternatively, you can purchase a dedicated battery terminal cleaner from an auto parts store.
Be sure to thoroughly clean both the battery terminals and the cable connectors, removing any signs of corrosion or buildup.
Step 7: (Optional) Install the new battery
If you’re replacing the battery, follow the same steps in reverse order to install the new one:
- Place the new battery in the compartment and secure it with the restraint system, ensuring it’s snug but not overly tight.
- Connect the positive terminal cable first, tightening the connection securely with a wrench or pliers.
- Then, connect the negative terminal cable, ensuring a tight and secure connection.
- Reconnect any additional cables or vents, following the manufacturer’s instructions.
Once the new battery is installed, you may need to reset specific vehicle systems or settings, such as the clock, radio presets, or any error codes triggered by the battery disconnection.
Some additional tips and best practices for car battery care and maintenance:
- Inspect the battery regularly: Check for any signs of corrosion, leaks, or damage to the terminals or casing. A swollen or misshapen battery case can indicate internal damage or overcharging.
- Clean the terminals: Use a wire brush and a baking soda solution to remove any buildup on the terminals, ensuring a good connection. Corrosion can lead to poor electrical conductivity and potential starting issues.
- Check the water level (for lead-acid batteries): Top up with distilled water if necessary, following the manufacturer’s instructions. Allowing the water level to drop too low can damage the battery plates.
- Avoid overcharging or deep discharging: Both can shorten the battery’s lifespan by causing excessive heat or damaging the internal plates.
- Consider a battery maintainer or trickle charger: These devices can help maintain the battery’s charge during extended periods of non-use, such as when storing a vehicle over the winter.
- Replace the battery on time: Most car batteries last 3-5 years, but factors like temperature extremes, short trip lengths, and usage patterns can affect their lifespan. Replace the battery before it fails.
- Secure the battery properly: Ensure the battery is snugly mounted and secured in its compartment to prevent vibration or movement, which can damage the internal components.
By following these guidelines and adequately caring for your car battery, you can maximize its performance, extend its lifespan, and avoid being stranded with a dead battery. Regular maintenance and timely replacement are crucial to running your vehicle’s electrical system smoothly.
Read More Posts
Comprehensive Guide To Vehicle Service History Checks
Exploring Average Car Weights: How Much Does A Car Weigh?
FAQs
Which battery terminal do you take off first?
When removing a car battery, it’s recommended to disconnect the negative (-) terminal first.
In what order do I disconnect a car battery?
Disconnect the negative (-) terminal first, followed by the positive (+) terminal.
What happens if you disconnect the positive terminal first?
Disconnecting the positive terminal first can create a risk of short-circuiting the battery or causing sparks due to exposed metal parts contacting the car’s body.
Which battery terminal should be disconnected to avoid battery drain?
Disconnecting the negative (-) terminal helps avoid battery drain and minimizes the risk of short-circuiting or electrical issues.
Conclusion
Disconnecting a car battery is a straightforward process that can be accomplished with a few essential tools and some precautions. Remember to permanently remove the negative terminal first and reconnect it last to prevent short circuits or sparks. Additionally, handle the battery with care, as it contains corrosive acid. Following these steps, you can safely disconnect your car’s battery for maintenance, replacement, or storage purposes.