Bike Brake Adjustment Guide
Adjusting your bike brakes is a crucial aspect of bicycle maintenance that directly impacts your safety and riding experience. Whether navigating city streets or hitting the trails, adequately adjusted brakes ensure reliable stopping power and control. This comprehensive guide delves into the step-by-step process of changing your bike brakes, covering everything from checking brake pads to fine-tuning calipers.
Why Do I Need to Adjust My Bike Brakes?
Before diving into the adjustment process, let’s understand why it’s essential to maintain your bicycle brakes regularly. Bicycle brakes are subjected to wear and tear due to frequent use and exposure to various environmental factors. Over time, brake pads wear down, brake cables stretch, and calipers may become misaligned, compromising braking performance.
Ignoring these issues can lead to decreased stopping power, longer braking distances, and potentially hazardous situations on the road or trail. By proactively adjusting your bike brakes, you can ensure optimal performance and safety during every ride.
Step-by-Step Guide to Adjusting Bike Brakes
Step 1: Check the Brake Pads
Begin by inspecting your brake pads for signs of wear and tear. Brake pad wear is a common issue that affects braking performance. Look for indicators such as thinning pads, uneven wear, or visible damage. If the brake pads are worn down past the wear line or show significant signs of wear, it’s time to replace them.
Step 2: Assess the Brake Pads’ Grip on the Rim
Next, squeeze the brake lever to observe how the pads interact with the rim. Both brake pads should engage the rim simultaneously, with equal spacing above and below the pad. Misaligned brake pads can lead to uneven braking or interference with the tire or spokes. Ensure proper alignment for optimal braking efficiency and safety.
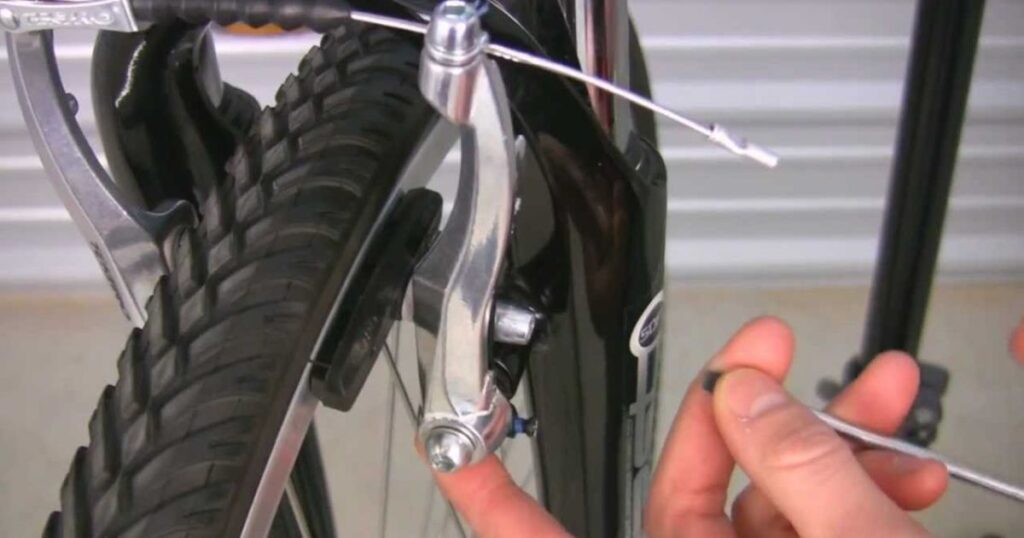
Step 3: Center the Brake Pads
Loosen the bolts holding the brake pads in place using an Allen wrench. Adjust the position of the brake pads within the brake pad holder to center them on the rim. Once centered, tighten the bolts securely to prevent movement during braking. Repeat this process for both brake pads to ensure uniformity.
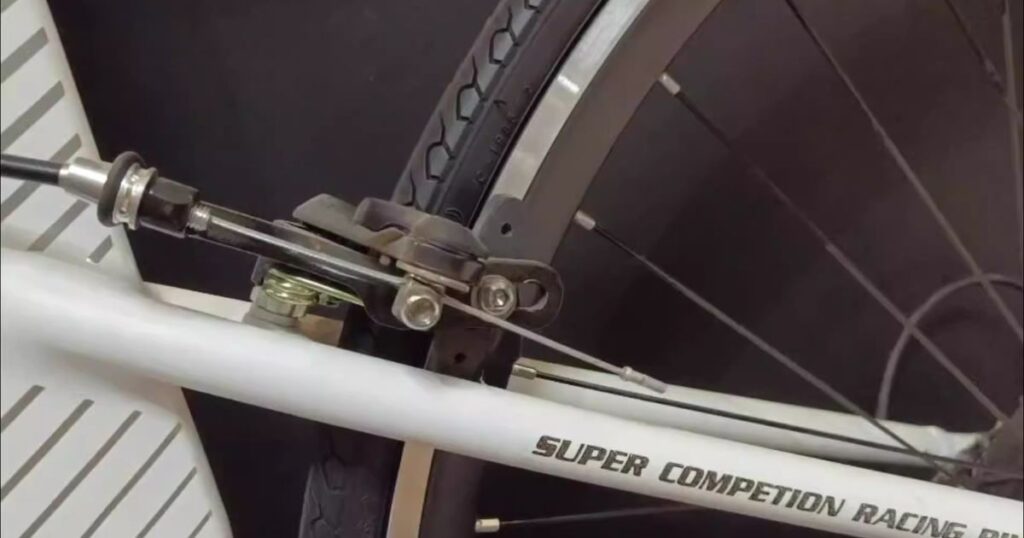
Step 4: Check the Bicycle Brake Cables
Test the tightness of your brake cables by pulling each brake lever. Ideally, there should be approximately 1 ½ inches (3.8 cm) of space between the lever and the handlebars when engaged. If the levers come into contact with the handlebars, the brake cables are too loose and require adjustment.
- Loosen the barrel adjusters located where the brake cables meet the brake levers.
- If the cables are too loose, adjust them at the caliper. Unscrew the bolt holding the brake cable on the caliper and pull it outward to tighten it.
Step 5: Adjust the Calipers
With the brake cables properly adjusted, fine-tune the calipers to ensure optimal braking performance. Unscrew the bolt holding the brake cable on the caliper and pull it outward to tighten it. Once tightened, secure the bolt in place. Finally, tighten the barrel adjusters on the handlebars to complete the adjustment process.
What Should I Check for if My Bike Has V-brakes?
If your bike is equipped with V-brakes, the adjustment process follows similar principles but with slight variations specific to V-brake systems.
How to adjust V brakes
Adjusting V brakes involves the following steps:
- Check brake pad alignment: Ensure the brake pads make even contact with the rim without touching the tire or spokes.
- Adjust pad position: Loosen the brake pad bolts and adjust the position of the pads as needed to center them on the rim.
- Fine-tune cable tension: Test the tightness of the brake cables and adjust as necessary to achieve the desired brake lever feel.
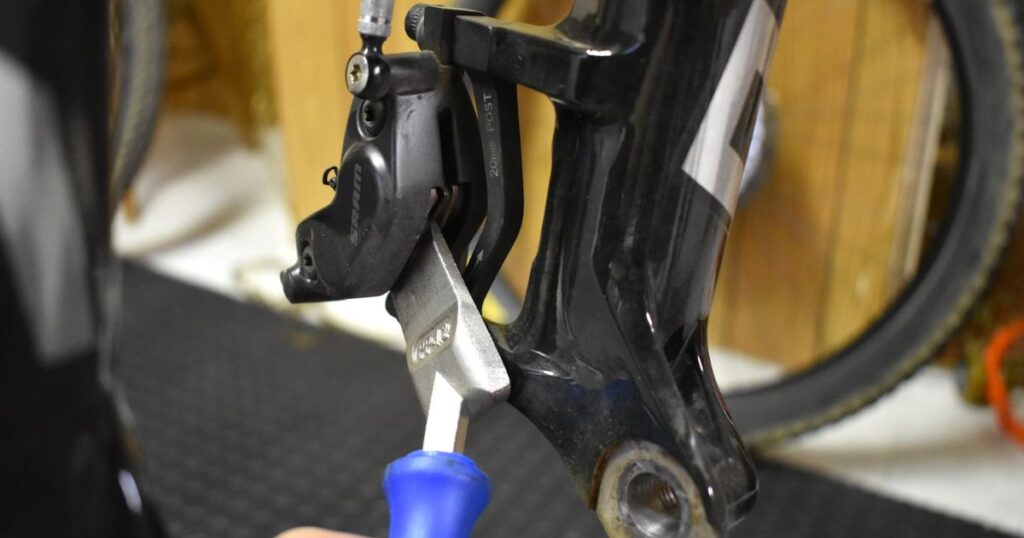
How Do I Tighten Bike Disc Brakes
For bikes equipped with disc brakes, the adjustment process may differ slightly due to the unique characteristics of disc brake systems.
- Check rotor alignment: Ensure the brake rotor is aligned within the caliper to prevent rubbing.
- Adjust pad clearance: Fine-tune the brake calipers to adjust the clearance between the brake pads and rotor.
- Check hydraulic brake fluid: If you have hydraulic disc brakes, check the brake fluid level and bleed the system if necessary to maintain optimal performance.
The Benefits Of Knowing How To Adjust Your Bike Brakes
Understanding how to adjust your bike brakes offers numerous benefits:
- Enhanced safety: Properly adjusted brakes provide reliable stopping power, reducing the risk of accidents or collisions.
- Improved performance: Well-maintained brakes offer better control and responsiveness, enhancing your overall riding experience.
- Cost savings: Regular brake maintenance can prolong the lifespan of brake components, reducing the need for costly repairs or replacements.
Read More Posts
How Much Does It Cost To Wrap A Car In 2024?
How Long Do Car Batteries Last?
FAQs
How do I keep my bike brakes from rubbing?
First, check the wheel’s alignment in the frame to keep the bike brakes from rubbing. Then, adjust the brake calipers to ensure they’re centered over the rim. If the rubbing persists, check for any bent or damaged brake components and replace them if necessary.
How to adjust a bicycle brake?
Inspect the brake pads for wear and alignment to adjust a bicycle brake. Then, use an Allen wrench to loosen the bolts holding the pads in place. Adjust the pads’ position to center them on the rim, ensuring equal spacing above and below. Finally, tighten the bolts securely and test the brake’s performance.
Why are my bike brakes not gripping?
Several factors can cause bike brakes not to grip appropriately, including worn brake pads, misaligned calipers, or loose brake cables. Inspect the brake pads for wear and alignment, adjust the calipers to center them on the rim, and tighten the brake cables to improve grip.
How do you position bike brakes?
To position bike brakes correctly, ensure that the brake pads make even contact with the rim when engaged. The pads should be centered on the rim with equal spacing above and below. Use an Allen wrench to adjust the position of the brake pads within the brake pad holder, then tighten the bolts securely.
Conclusion
In conclusion, mastering the art of bike brake adjustment is essential for every cyclist. By following this comprehensive guide, you can ensure your brakes perform optimally, keeping you safe on the road or trail.
Regular maintenance and adjustment of your bicycle brakes enhance safety and performance and enhance a more enjoyable riding experience. Remember to inspect your brakes regularly, address any issues promptly, and enjoy the peace of mind of knowing your brakes are in top condition. Happy riding!